The Module Template
Setting up the Module Template
When your Module is created or rolled over the tabbed block will appear my default, you won't have to add it yourself, however you or your faculty Online Course Developers will have to add some information to the tabs within the block.
Pre-filled information
We have worked with DSAA to enable the Module Overview and Learning Outcomes tabs to be automatically populated with information held centrally. This information will be automatically filled in on or soon after July 14th once this information has been finalised in the central system. After this date the fields in the settings form will be locked.
If your module starts teaching before the 14th July, you will have to fill the Module Overview (Section 3) and Learning Outcomes (Section 4) settings manually – the manual content then will be overwritten with the centrally held data on or soon after the 14th July.
Editing the block
Watch our video if you would like to see a brief overview of the Moodle Baseline settings – this may help even if you intend to use the text guide as a reference.
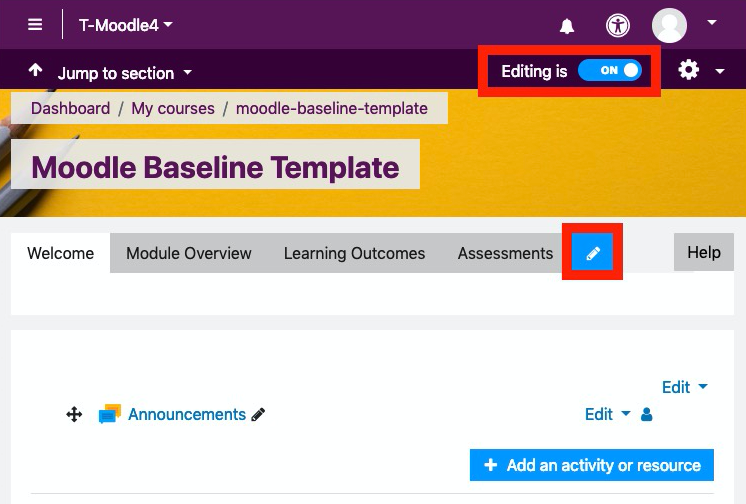
To begin editing the information in this block, log in to Moodle, and navigate to the module that you want to work on. Once you've found it, turn editing on, and click on the blue pencil button within the block - to the right of the tabs, as shown in the image.
Important
This information is based on setting up the Module Template for a new Moodle Module. The principles are also transferrable to modules with existing content.
1. Module specification link
The first step is to add the link to the agreed module specification on Module Web Search. Everything you include in the following settings should match the information on this agreed module specification page. To add the link, copy and paste the URL to your module specification in Module Web Search into the first field in the settings form as shown here:

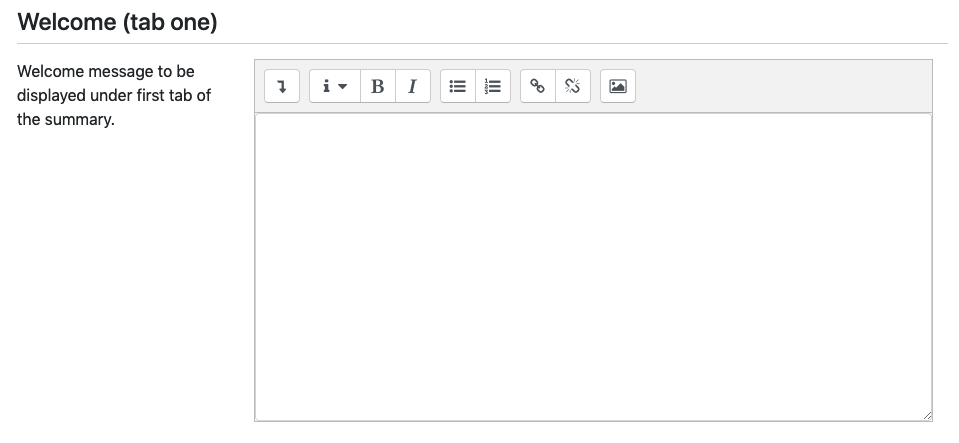
2. Welcome tab
Use the text field to enter the information that you want to appear in the welcome message. This field will accept HTML content, so you may included embedded videos or other similar content alongside text if you prefer. Remember that this tab is the first thing that a student will see, so it's preferable to keep it as concise as possible.
For information on what type of content to include here, refer to the Welcome tab page of this website.
Important
This Pre-filled information will be automatically populated in on or soon after July 14th. You only need to complete this information manually if your module starts teaching before this date.
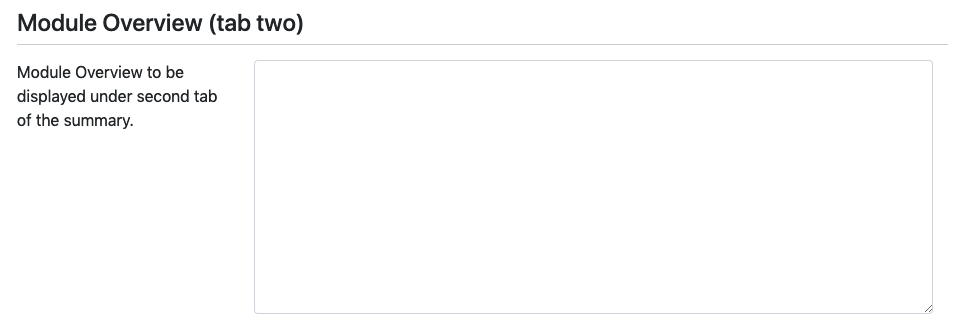
3. Module Overview tab Pre-filled
If you need to manually fill out the Module overview tab you can enter text only into the box shown in the screenshot. This box will only accept text and not HTML.
This information must be copied from the module specification.
For information on what type of content to include here, refer to the Module Overview tab page of this website.
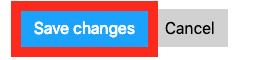
Once you have completed making your changes click Save changes.
4. Learning Outcomes tab Pre-filled
If you need to manually fill out the Learning outcomes tab you can enter text only into the fields shown in the screenshot. This information must be copied from the module specification.
For information on what type of content to include here, refer to the Learning Outcomes tab page of this website.
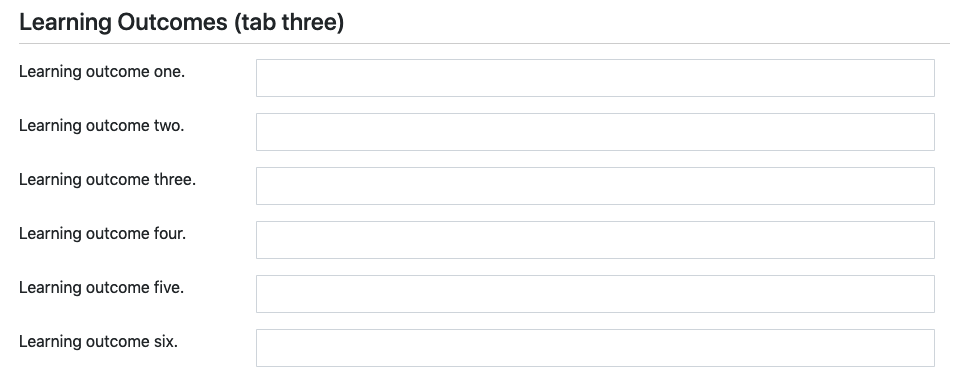
Once you have completed making your changes click Save changes.
5a. Assessment Summary tab
The Assessment summary tab is the most complex to set up, as there are two stages, completing the summary (detailed in this step) and tagging the assessments on your module (section 5b of this guide).
Firstly, complete the text field under the Assessments section of the settings page. This text field should be used explain the upcoming assessments for this module, and would likely be similar to the information you may have included in your module handbook.
For information on what type of content to include here, refer to the Assessment Summary tab page of this website.
Secondly, you should include a link to another topic on your Moodle module which contains information on assessment guidelines and links to other support materials, including how a student can fill in an Extenuating Circumstances Form if required.
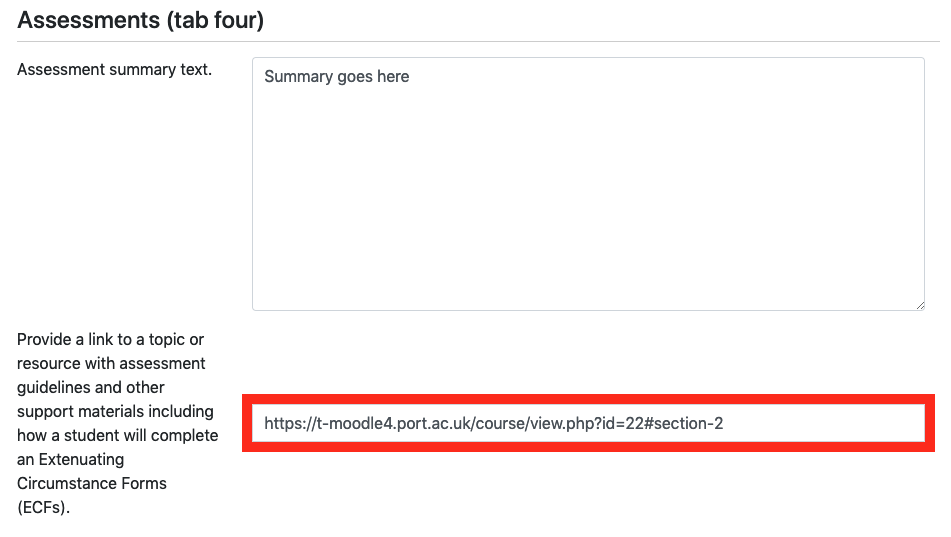
Once you have completed making your changes click Save changes.
Important
As there is no restriction on the number of tags you can add, ensure you only add one assessment weighting. If you add more than one, the system will only use the highest value weighting and ignore the other.
5b. Tagging assessments
Tagging assessments as summative or as a late hand-in location is what makes assessments appear on the assessment summary tab.
Watch our video on tagging your assessments so they appear in the Moodle Baseline tab block.
There are currently five types of content that can be tagged to appear in the assessment summary tab. These are:
Moodle Assignment
Shows submission progress and student submission status.
Turnitin
Shows submission progress and student submission status.
Quiz
Will not show the submission progress or student submission status.
Workshop
Will not show the submission progress or student submission status.
Lesson
Shows submission progress and student submission status.
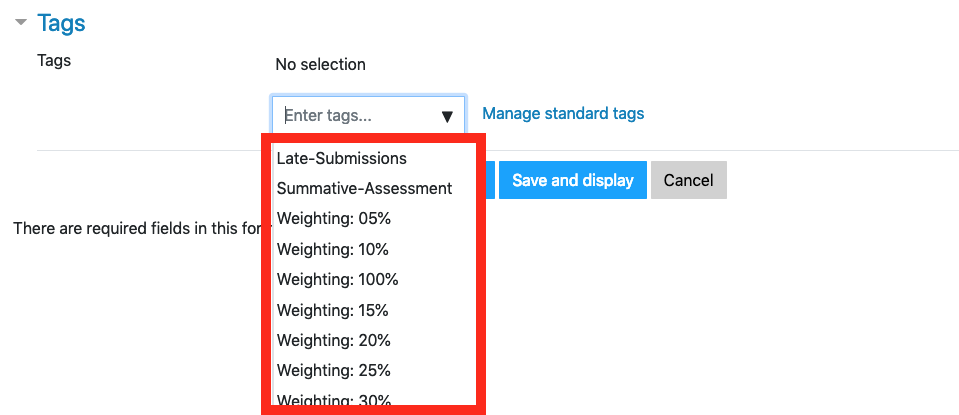
Once you've chosen one of the listed activities, set it up as usual, but pay close attention to the tagging section at the foot of the settings page and click the Enter tags dropdown to see a list of the available tags.

To add a tag, select it from the list.
You should add both an assessment designation, either Summative-Assessment or Late-Submissions, and an assessment weighting.
The assessment weighting should match the weighting factor on the full module specification.
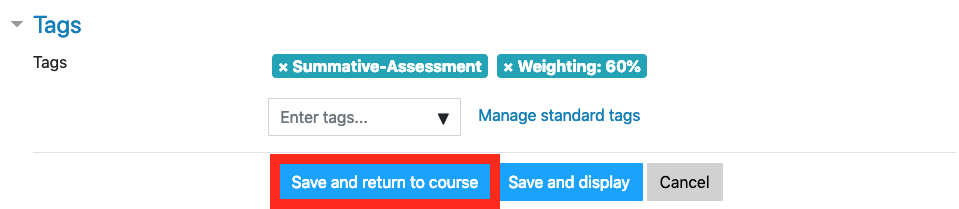
When you choose a tag it will appear above the Enter tags box in a green label.
To remove a tag click the X to the left of the label name.
When you are happy with your tags, click Save and return to course.
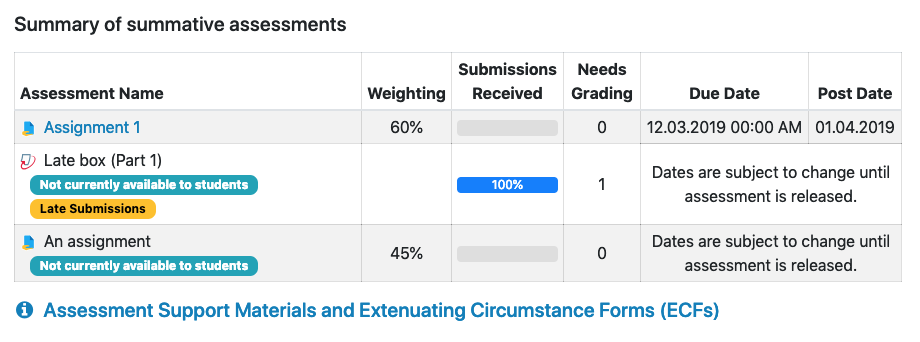
Once you have tagged your assessments they will appear in the assessment tab similar to the screenshot below.
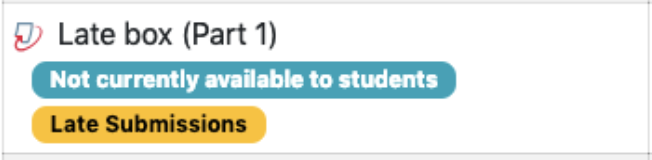
5c. Tagging late boxes
Adding the Late-submissions tag to an assessment will result in the late submission label being added to the listing in the assessment summary tab, as shown here:
If you choose to create a separate late submission you should also ensure you have created a main submission for non-late work.
Notice that the example box is not visible to students. When you set up a late submission assessment, you must add an assessment start date in the assessment settings as shown below:
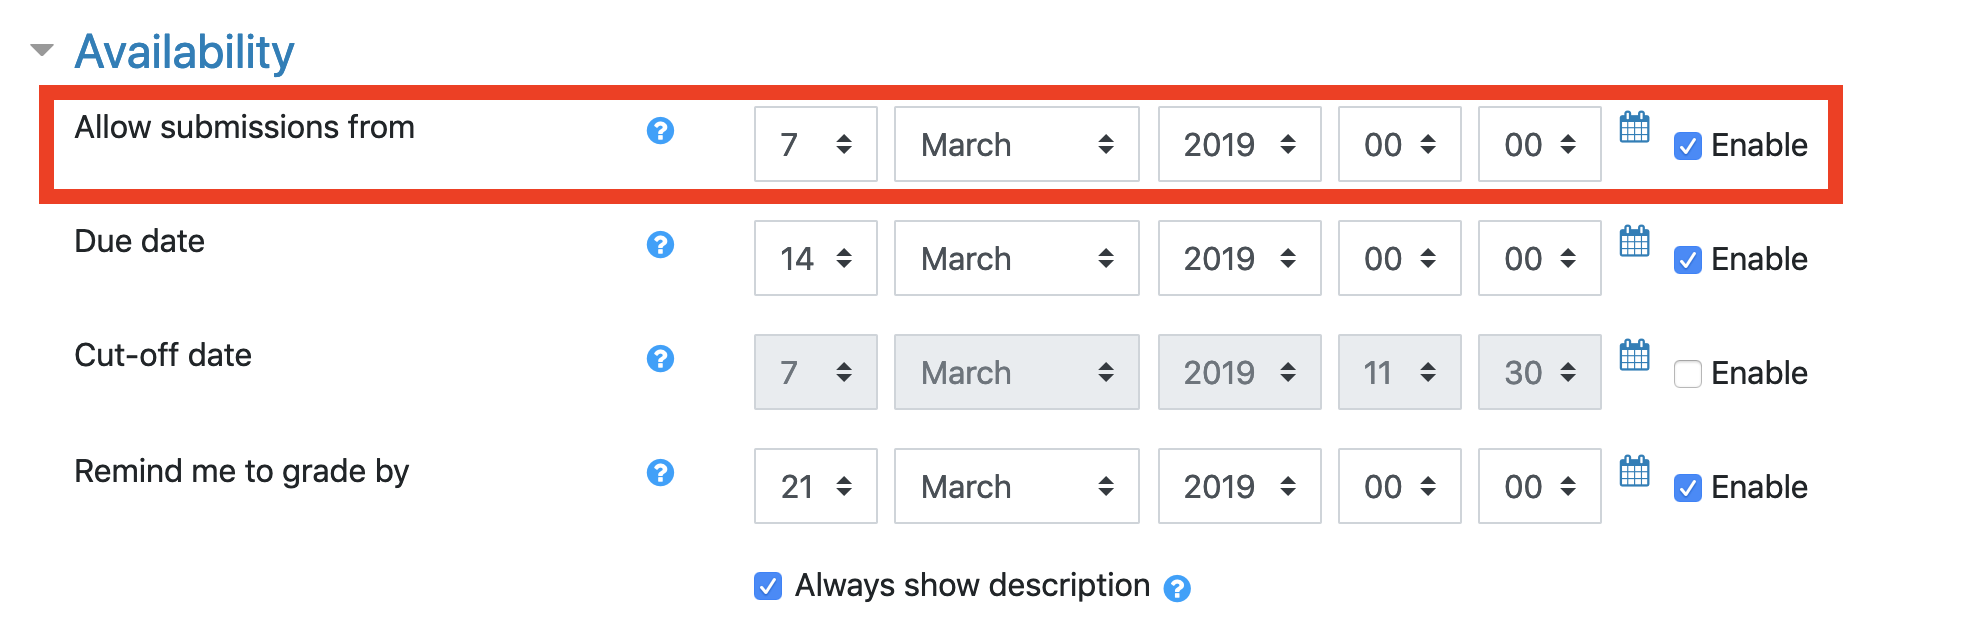
You should set this to the date and time that the primary submission box closes, this way, once the primary box closes, the late box will show in the Assessment Summary tab to students.
Once you have completed making your changes click Save changes.
Important
An external system assessment is defined as an assessment which is submitted on a separate system to Moodle and where students receive feedback via this separate system.
5d. Adding external system assessments
Please note
External system assessments are not the preferred manner of adding assessments to the assessment summary tab. Only use this method if you have a specific reason not to use a standard Moodle assessment type.Adding an external system assessment to the Assessment summary tab allows students to see information about assessments that are being conducted and submitted outside of Moodle, on another assessment system.
If you'd like to use Moodle to pass feedback about an offline assessment, for example and art project or an assessed presentation, it would be appropriate to use an Moodle Assignment with the submissions options unchecked.
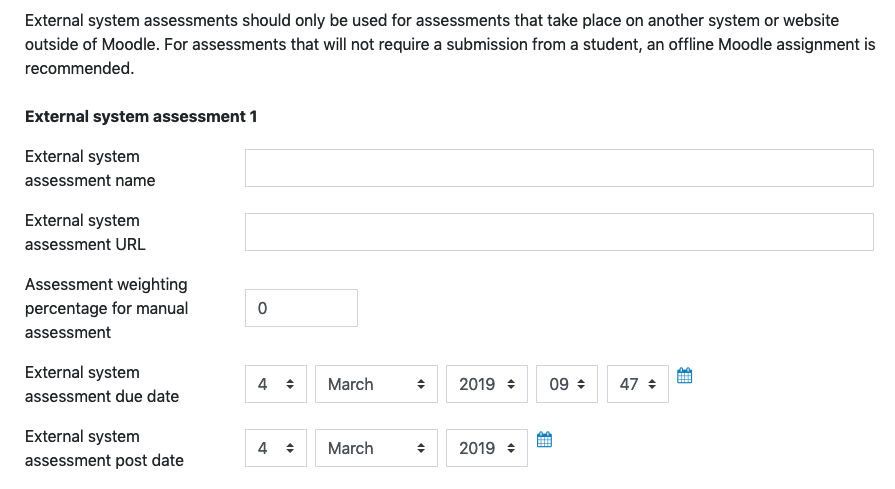
To add an external system assessment fill in the fields in the form found in the Moodle Baseline settings page as shown in the screenshot here:
Once you have completed making your changes click Save changes.